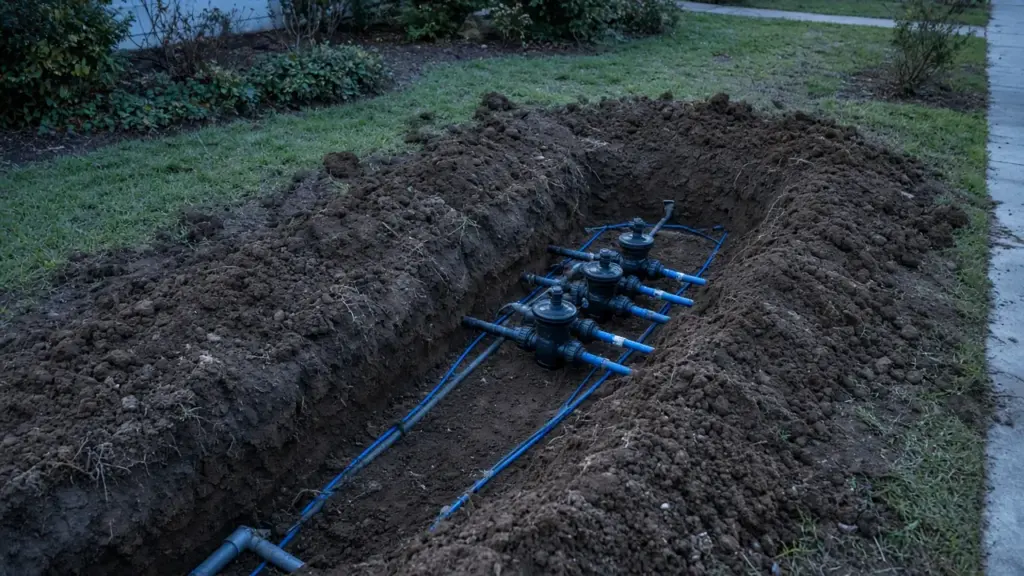
In an older sprinkler system, the parts that cause the most frustration are often hidden: valves buried in boxes that have filled with dirt, and wiring spliced together years ago with materials that were never meant to stay underground. Zones that work one day and not the next, valves that weep, and controllers that seem to have minds of their own frequently trace back to aging valves and wiring.
This guide explains when upgrading valves and wiring makes sense and what a good upgrade includes.
Signs Your Valves Need Upgrading
- Frequent repairs: diaphragms and solenoids replaced repeatedly
- Weeping or stuck valves that do not close fully
- Valves that open slowly or not at all
- Cracked bodies or bonnets, often from age or freeze damage
- Parts that are no longer available for older models
- Anti-siphon valves above ground that are exposed to freezes and damage
Our guides to a zone that will not turn off and a zone that will not turn on cover valve symptoms.
Signs Your Wiring Needs Upgrading
- Intermittent zones that work sometimes and fail other times
- Multiple zones failing together
- Corroded splices found in valve boxes
- Wire nuts wrapped in tape instead of waterproof connectors
- Nicked or damaged insulation from past digging
- Two zones running at once due to shorted wires
- No spare wires for adding zones
Our guide to two zones running at once explains wiring faults.
Choosing New Valves
Modern residential valves from major manufacturers are reliable and widely supported. When choosing:
- Match the valve size to the zone’s flow.
- Consider flow control for fine-tuning zones.
- Choose a model with readily available parts.
- Consider consistency: using the same model throughout makes spare parts simpler.
- Jar-top or screw bonnet: jar-top styles make cleaning easier; screw bonnets are common and robust.
Our guides to Rain Bird DV vs. JAR-TOP vs. PGA valves and Hunter PGV troubleshooting compare common models.
Valve Manifolds
Grouping valves together in a manifold, a set of valves connected to the mainline in one or two locations, simplifies maintenance and wiring. If an older system has valves scattered around the yard, consolidating them during an upgrade can make future repairs easier. Manifolds should be in valve boxes large enough to work in.
Valve Boxes
Upgrading valves is a good time to upgrade valve boxes:
- Right size: big enough to access valves and splices.
- Gravel base: a layer of gravel under the valves helps drainage.
- Lids at grade: easy to find, not buried.
- Labeled lids: some boxes allow labels for zone numbers.
Our guide to flooded valve boxes explains how to keep boxes dry.
Irrigation Wire
Irrigation wire is designed for direct burial, with insulation rated for underground use. Common practice includes:
- Multi-conductor cable with color-coded wires, one for each valve plus a common
- Spare conductors for future zones or as backups
- Proper gauge for the distance between controller and valves
Waterproof Splices
Splices are the weakest point in irrigation wiring. Wire nuts and electrical tape fail underground as moisture corrodes the copper. Use connectors designed for direct burial, such as gel-filled or grease-filled connectors. Keep splices in valve boxes rather than buried in soil when possible, so they can be inspected.
The Common Wire
All valves share a common wire back to the controller. A break in the common wire causes multiple zones to fail. During a wiring upgrade, make sure the common is sound, properly spliced, and ideally has a spare.
Protecting Wire Routes
- Run wire alongside the mainline where possible, which keeps it at a similar depth and makes it easier to find.
- Mark wire routes on a system map.
- Call 811 before digging.
- Avoid shallow wire near areas that will be aerated or edged.
When to Upgrade the Controller Too
If you are replacing valves and wiring, it may make sense to upgrade the controller at the same time, especially if it lacks features such as seasonal adjust, multiple start times, or weather-based adjustment. Our irrigation controller repair guide explains options.
Upgrading in Stages
A full valve and wiring upgrade can be done at once or in stages. Some homeowners start with the worst zones or with a single manifold. Others upgrade everything during a larger retrofit. Our guide to retrofitting an old system with modern heads covers broader system upgrades.
Testing After the Upgrade
- Test each solenoid’s resistance at the controller.
- Run each zone from the controller.
- Check that valves open fully and close promptly.
- Check for leaks at valve connections.
- Label zones at the controller and in valve boxes.
Mapping the System During the Upgrade
An upgrade is the ideal time to create an accurate system map. As valves are replaced and wiring is run, record:
- The location of each valve box
- Which zone each valve controls
- Wire colors assigned to each zone
- The route of the mainline and wire bundle
- The location of spare conductors
Keep the map with your controller notes and a copy on your phone. The next person who works on the system, whether you or a technician, will save significant time.
Controller Terminal Labels
At the controller, label each station wire with its zone number and a short description, such as front lawn east or back beds. Many controllers have a place to record zone names; smart controllers let you name zones in the app. Clear labels make troubleshooting straightforward and reduce mistakes when reconnecting wires after a controller replacement.
Costs and Value
Valve and wiring upgrades involve labor to dig, replace components, and pull wire, so they are more involved than replacing a head. Their value shows up over time: fewer service calls, fewer intermittent failures, and more reliable watering on your assigned days. If you are paying for repeated valve and wiring repairs every season, an upgrade often pays for itself in avoided repairs and wasted water.
Coordinating With Other Projects
If you are planning landscaping, a patio, or other yard work, coordinate the valve and wiring upgrade with it. Running new wire and relocating valves is easier before new hardscape or sod goes down. Install sleeves under new walkways for future wire runs.
Replacing Above-Ground Anti-Siphon Valves
Some older Dallas systems use above-ground anti-siphon valves, each with its own built-in backflow protection. These valves are exposed to freezing, mower strikes, and sun. Replacing them with in-ground valves requires adding a single backflow preventer for the whole system upstream of the new valves, which involves backflow testing and may involve permit requirements. It is a bigger project than swapping valves, but it consolidates protection into one device and moves valves underground where they are better protected.
Frequently Asked Questions
When should I replace my sprinkler valves?
When repairs become frequent, valves weep or stick, bodies crack, or parts are unavailable.
Why do my sprinkler zones work intermittently?
Corroded splices, damaged wire insulation, or a failing common wire are common causes.
What kind of wire splices should I use for irrigation?
Waterproof connectors designed for direct burial, such as gel-filled or grease-filled connectors.
Should I add spare wires when upgrading?
Yes. Spare conductors make adding zones and troubleshooting easier later.
Get Help Upgrading Valves and Wiring
We replace valves, rewire systems, and consolidate manifolds. See our irrigation services, or contact us to schedule.
Request Service or call 214-227-7444
We serve homes throughout Dallas and nearby North Texas communities.