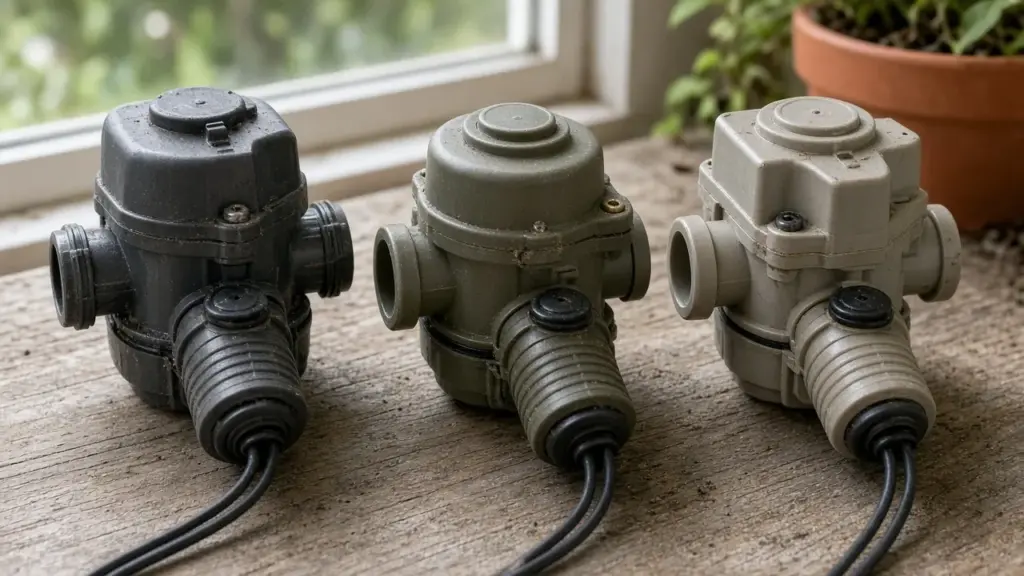
Open a valve box in a Dallas yard and there is a good chance you will find a Rain Bird valve. Three residential lines show up often: the DV series, the JAR-TOP, and the PGA. All three do the same basic job of opening and closing a zone when the controller signals, but they are built differently, and that affects how you clean and repair them.
This guide explains the key differences that matter when a valve needs attention. Always consult the manufacturer’s documentation for your specific model.
How These Valves Work
Most residential irrigation valves, including these three, are diaphragm valves operated by a solenoid. When the controller sends power, the solenoid lifts a plunger and releases water from above the diaphragm. Pressure below the diaphragm pushes it up, opening the valve. When the solenoid closes, water fills the chamber above the diaphragm again, and the valve closes.
Common valve problems include:
- Debris under the diaphragm or in small ports
- A torn or worn diaphragm
- A stuck or failed solenoid
- Leaks at the bonnet or connections
Our guides to a zone that will not turn off and a zone that will not turn on explain the symptoms.
Rain Bird DV Series
The DV series is a widely used residential valve line, often seen in glue-slip or threaded versions.
Repair characteristics:
- Bonnet: held on by screws. Remove the screws to lift the bonnet and access the diaphragm and spring.
- Flow control: some models include a flow control handle; others do not.
- Manual bleed: typically an internal bleed operated by turning the solenoid slightly, or an external bleed screw depending on the model.
- Diaphragm access: straightforward once the screws are out. Keep track of the spring and diaphragm orientation.
Rain Bird JAR-TOP
The JAR-TOP is named for its threaded bonnet, which unscrews like a jar lid.
Repair characteristics:
- Bonnet: threaded, no screws. It can be removed by hand, which makes cleaning faster and eliminates the risk of stripped screws.
- Flow control: some versions include a flow control.
- Manual bleed: typically internal, via the solenoid.
- Diaphragm access: very easy, which makes JAR-TOP valves popular with homeowners who want to flush debris themselves.
Take care not to cross-thread the bonnet when reinstalling, and check that the seal seats properly.
Rain Bird PGA
The PGA is a heavier-duty valve often found on larger residential and light commercial systems. It is available in globe and angle configurations.
Repair characteristics:
- Bonnet: held on by screws.
- Flow control: includes a flow control stem on top, which allows you to adjust flow and can be used to help close the valve.
- Manual bleed: external bleed screw on the bonnet.
- Diaphragm access: similar to other screw-bonnet valves.
Solenoids
These valves use solenoids that thread into the bonnet. Solenoids can often be replaced without replacing the valve. Our guide to replacing a sprinkler solenoid without replacing the valve explains the process.
Flow Control: What It Does
A flow control stem limits how far the diaphragm can open. It can be used to fine-tune zone pressure or to help close a valve that is slow to shut. If a zone has weak pressure, check whether the flow control has been turned down. Our guide to weak pressure on only one zone covers this and other causes.
Cleaning a Valve
For any of these valves:
- Turn off water to the irrigation system at the shutoff.
- Relieve pressure by opening the manual bleed.
- Clear dirt from the valve box so it does not fall into the valve.
- Remove the bonnet by screws or by unscrewing a JAR-TOP.
- Remove the spring and diaphragm, noting orientation.
- Rinse the diaphragm and check for tears or hardening.
- Clean the ports gently, without enlarging them.
- Reassemble in the same orientation.
- Turn water back on slowly and test the zone.
When to Replace the Diaphragm
Replace the diaphragm if it is torn, stretched, hardened, or has a damaged seal. Use the diaphragm designed for your valve model and size.
When to Replace the Whole Valve
Replace the valve when the body is cracked, threads are stripped, parts are unavailable, or the valve has failed repeatedly.
Identifying Your Valve
Look for markings on the bonnet or body indicating the brand and model. JAR-TOP valves are easy to recognize by their threaded top. PGA valves have a flow control stem and an external bleed screw. If you cannot identify the valve, a photo can help a technician bring the right parts.
Flooded Valve Boxes
Valve boxes that stay full of water make repairs harder and can corrode wiring. Our guide to flooded valve boxes explains how to address the problem.
Anti-Siphon Valves Are Different
Some older Dallas systems use anti-siphon valves, which sit above ground and include a built-in backflow prevention device. These are not the same as the in-ground DV, JAR-TOP, and PGA valves described here, and they are repaired differently. If your valves stand above ground near the house with a cap on top of each one, they may be anti-siphon valves. Anti-siphon valves are also more exposed to freezing.
Mixing Valve Brands
It is common to find a mix of brands and models in one valve manifold, especially on systems that have been repaired over many years. There is nothing wrong with that, but it does mean keeping track of which repair kits fit which valve. A photo of each valve with its zone number, kept with your controller notes, makes future repairs faster.
Common Mistakes During Valve Repair
- Losing track of the spring. It sits between the diaphragm and bonnet and must go back in the right orientation.
- Turning water on too fast. Open the shutoff slowly to avoid water hammer and pressure surges.
- Overtightening screws. Screws on plastic bonnets can strip their threads.
- Cross-threading a JAR-TOP bonnet. Start it by hand and make sure it turns smoothly.
- Letting dirt into the valve. Clear the valve box first and keep parts on a clean towel.
- Replacing a diaphragm with the wrong model. Parts are not always interchangeable across valve lines or sizes.
Testing After Repair
After reassembly, turn water on slowly, then run the zone from the controller rather than the manual bleed. Watch that it opens fully and closes promptly when the cycle ends. Check the bonnet for leaks. If the zone keeps running or seeping after shutoff, debris may still be caught under the diaphragm, or the diaphragm may not be seated.
Keeping Valves Accessible
Many valve problems take longer to fix simply because the valve box is buried under turf or mulch. Keep valve box lids at grade and visible. Our valve repair guide covers other valve issues.
Frequently Asked Questions
What is the difference between Rain Bird DV and JAR-TOP valves?
The main repair difference is the bonnet: DV valves use screws, while JAR-TOP valves have a threaded bonnet that unscrews by hand.
Does the Rain Bird PGA valve have flow control?
Yes. The PGA includes a flow control stem and an external bleed screw.
Can I replace just the solenoid on a Rain Bird valve?
Often, yes. Solenoids thread into the bonnet and can be replaced separately.
How do I clean debris from a sprinkler valve?
Shut off water, relieve pressure, remove the bonnet, rinse the diaphragm and ports, and reassemble in the same orientation.
Get Help With Valve Repair
We repair and replace Rain Bird and other irrigation valves across Dallas. See our sprinkler repair service, or contact us to schedule.
Request Service or call 214-227-7444
We serve homes throughout Dallas and nearby North Texas communities.