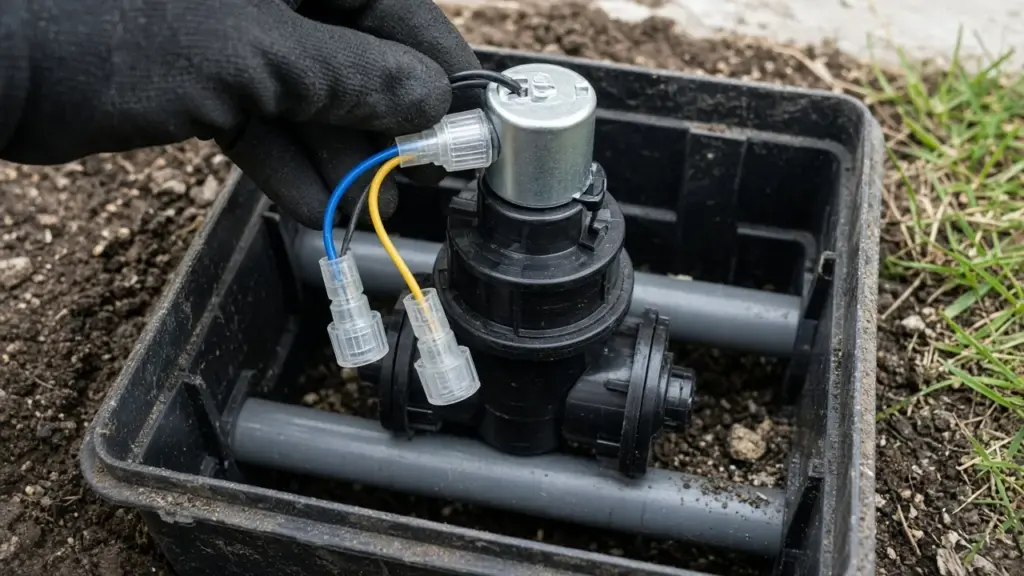
Each sprinkler valve has a small electrical part on top called a solenoid. When the controller sends power, the solenoid lifts a plunger that lets the valve open. When power stops, the plunger drops and the valve closes. Solenoids are simple and generally reliable, but they do fail. The good news is that replacing a solenoid is often much easier and less expensive than replacing the whole valve.
This guide explains how solenoids fail, how to test one, and how to replace it.
How a Solenoid Works
A solenoid is a coil of wire around a metal plunger. Two wires connect it to the controller: one to the station terminal and one to the common wire. When the controller energizes the station, current flows through the coil, creating a magnetic field that lifts the plunger. That releases water from the chamber above the valve diaphragm, and the valve opens. When current stops, a spring pushes the plunger down, water pressure builds above the diaphragm, and the valve closes.
Our guide to sprinkler valve repair explains the full valve.
Signs of a Bad Solenoid
- Zone will not turn on from the controller, but opens with the manual bleed
- Zone will not turn off because the plunger is stuck
- Controller shows a fault on that station
- Zone works intermittently
- Solenoid is visibly damaged, cracked, or corroded
These symptoms can also come from wiring problems, so test before replacing. Our guides to a zone that will not turn on and a zone that will not turn off cover the full diagnosis.
Testing a Solenoid
At the controller
With a multimeter set to resistance, measure between the station terminal and the common terminal with wires disconnected from the controller. A reading within the typical range for irrigation solenoids suggests the solenoid and wire are okay. A very low reading suggests a short. A very high or infinite reading suggests an open circuit, from a broken wire or a failed coil.
At the valve
To separate a solenoid problem from a wire problem, disconnect the solenoid leads at the valve and measure the solenoid directly. If the solenoid reads normally at the valve but not from the controller, the wire is the problem.
Listen for the click
With the zone running, a working solenoid often makes a soft click or hum. No sound may indicate no power reaching the solenoid, or a failed coil.
Before Replacing
- Check the manual bleed. If the valve does not open even with manual bleed, the problem may be the diaphragm or debris, not the solenoid.
- Check the wire connections at the valve for corrosion or loose splices.
- Identify the valve brand and model. Solenoids are often brand-specific.
How to Replace a Solenoid
- Turn off the controller or the zone.
- Turn off the water to the irrigation system if needed. Many solenoids can be replaced with the water on if you work carefully, but shutting off the supply avoids surprises.
- Cut the solenoid wires near the old splice, leaving enough wire to make a new connection.
- Unscrew the old solenoid counterclockwise. Hold the plunger and spring in place if they come loose; they sometimes stay in the valve.
- Clean the port of debris.
- Install the new solenoid, making sure the plunger and spring are seated and the O-ring is in place. Tighten by hand.
- Connect the wires with waterproof connectors, one solenoid lead to the station wire and one to the common.
- Turn the water back on and test the zone from the controller.
Waterproof Connections Matter
Valve boxes are damp and can flood. Standard wire nuts corrode quickly underground. Use connectors designed for direct burial or irrigation use. Poor splices are one of the most common causes of intermittent zone failures.
When the Solenoid Is Not the Problem
- Damaged wire: a cut or nicked wire between the controller and valve
- Bad common wire: affects multiple zones
- Controller output failure: one station output fails
- Diaphragm damage: valve will not open or close properly even with good electrical signal
- Debris in the valve: keeps it from closing
Why Replace Only the Solenoid
- Faster and less disruptive than replacing a valve
- No need to cut pipe
- Lower parts cost
If the valve body is cracked, the diaphragm is damaged, and the valve is old, replacing the whole valve may make more sense.
Solenoids and Valve Brands
Many residential valve brands use their own solenoid designs, and not all solenoids fit all valves. Some solenoids fit several models within a brand. Take the old solenoid with you or note the brand and model before buying a replacement. Our guide to finding buried valve boxes helps if you cannot locate the valve.
Stuck Plungers
A solenoid plunger can stick in the raised position from debris or corrosion, leaving the zone running. Sometimes removing and cleaning the plunger restores operation. If it sticks again, replace the solenoid.
Lightning and Surges
Power surges can damage solenoids and controller outputs. If several solenoids fail at once after a storm, check the controller too.
Keeping a Spare
If your system uses one valve brand throughout, keeping a spare solenoid on hand can turn an emergency into a quick fix. If a zone sticks on during the day and you have a spare, you can swap the solenoid and get back to your normal schedule without waiting for parts. Label the spare with the valve brand and model it fits.
Solenoids in Flooded Boxes
Valve boxes that fill with water or soil are hard on solenoids and connections. Corrosion builds up, connectors fail, and plungers stick. If a box floods regularly, fix the cause: raise the box, improve drainage beneath it with gravel, or repair nearby leaks. A clean, dry box helps solenoids and splices last.
A Note on Safety
Irrigation valves run on low-voltage power from the controller, typically around 24 volts AC. Even so, turn off the controller or the station before working, and never work on the controller’s line-voltage side unless you are qualified. Keep connections clean and dry, and avoid kinking or nicking wire insulation.
After the Repair
Once the new solenoid is installed, run the zone from the controller for a few minutes. Confirm the valve opens promptly, every head pops up, and the valve closes fully when the zone stops. Watch the heads at the low end of the zone for a minute after shutoff; continued flow suggests the valve is not sealing, which points to the diaphragm or debris rather than the solenoid. Close the valve box lid securely to keep soil out, and note the repair in your system records.
Frequently Asked Questions
How do I know if my sprinkler solenoid is bad?
If the valve opens with the manual bleed but not from the controller, and the wire tests fine, the solenoid is a likely cause. A multimeter test can confirm.
Can I replace a solenoid without shutting off the water?
Often, yes, if you work carefully, but shutting off the supply avoids water spraying from the port.
Are sprinkler solenoids universal?
No. Many are brand-specific. Match the replacement to your valve.
Why does my zone keep running after replacing the solenoid?
The valve may have debris, a damaged diaphragm, or a problem with the controller.
Get Valve and Solenoid Help
We test and replace solenoids, repair valves, and fix wiring. See our sprinkler repair service, or contact us to schedule.
Request Service or call 214-227-7444
We serve homes throughout Dallas and nearby North Texas communities.